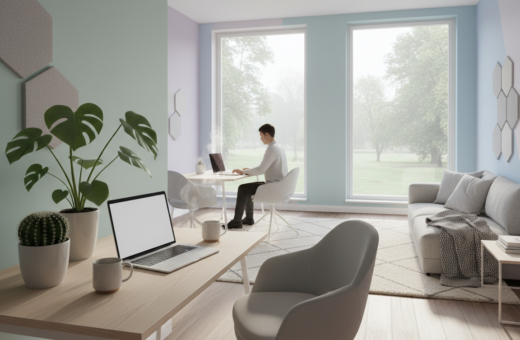
The post opens with a clear account of the author’s experience tuning an apartment office to control loud typing and room echo.
Moving from a rubber dome to a mechanical keyboard startled them. The sudden sound and added noise changed their daily routine.
This page explains one practical way to manage that change. It offers a straightforward setup that fits a tight space and shared office life.
Over time, they found content and steps that work. The post guides readers through choices that save time and keep a calm work area.
Understanding Why Mechanical Keyboards Create Noise
An upgrade in switch design can reveal hidden acoustic problems in a setup. This section explains where the sound and vibrations come from and why they travel through the chassis.
Switch Movement and Mounting System
Mechanical switches generate noise from the movement of a plastic stem against its housing. The Cherry MX Blue, for example, uses a click jacket that produces a sharp high-frequency sound at actuation.
The mounting style—from tray to gasket—controls how much movement transfers to the case. That movement then becomes a source of extra output that users feel and hear.
Case Resonance and Build
Cases made from thin plastic flex and act like echo chambers. By contrast, thick aluminum or CNC-machined material lowers resonance and limits how many times a press rings inside the shell.
- Switch design affects scraping and click noise.
- Mount type dictates how much vibration reaches the surface.
- Case material and screw count change the acoustic output.
Understanding these points on this page gives practical control over sound and helps guide later mods in the post.
How to Reduce Keyboard Vibration Apartment Desk Effectively
Placement and mass matter more than many users expect.
A heavy surface stops energy that would otherwise make wood panels ring. Many enthusiasts use 16-inch concrete pavers as a high-mass unit beneath a typing area. This mass-loading absorbs much of the motion and limits how much vibration reaches the rest of the furniture.
Isolation feet serve a different purpose: they decouple a device from a surface. For speakers or machinery, feet can prevent direct transmission. For a hollow wood table, however, adding mass often works better than relying on feet alone.
- The amount of transferred vibration drops when a stable, dense base sits under the device.
- A solid slab prevents the desk from acting as a resonator and lowers overall noise and sound energy.
- This page explains mass-loading versus decoupling so users can choose the best way for their setup.
Modifying Switches and Stabilizers for a Quieter Feel
Small changes to switches and stabilizers can transform how a setup sounds and feels. This section walks through practical steps to tame clicky action and unwanted metallic feedback inside the case.
Lubricating Moving Parts
Lubricating switch stems and contact points takes patience but pays off. A thin, even layer of thick grease on pivot and slider points removes the scraping plastic-on-plastic sound.
Work slowly and apply at each point. This prevents uneven feel and keeps the keyboard consistent every time the user types.
Stabilizer Tuning
Stabilizers often act as the main source of rattle on larger keys. Coating the contact points with dielectric grease eliminates metallic rattle and the hollow noise it sends through the case.
Clipping the small feet on the stabilizer housing lowers friction and helps the key return smoothly. That simple tweak improves both function and overall sound.
Band-aid Clipping Mod
The band-aid mod places a small pad under the stabilizer to cushion impact against the PCB. It is a proven way to dampen the stem’s contact and cut sharp clicks.
- Lubricating moving parts is time-consuming but cuts scraping sounds.
- Apply a thin coat to the stabilizer wire to stop metallic rattle.
- Use a soft adhesive pad and clip feet where needed to tune feel.
Summary: These methods give a quiet, reliable feel and support broader dampening plans in this post. With a bit of time and the right materials, one can markedly change the sound and function of a keyboard.
Enhancing Keycap Material and Thickness
A single keycap upgrade can move a typing tone from shrill to mellow.
Thicker keycaps, typically 1.3–1.5mm, shift the clack toward a lower frequency. This change gives each bottom-out event a deeper, less piercing sound and lowers high-pitched resonance inside the case.
PBT plastic often outperforms ABS for a controlled acoustic profile. Higher-quality materials absorb impact energy better, so the overall noise and internal echo are less pronounced.
Choosing caps with more mass also alters the sound signature of the entire keyboard. Profiles and wall thickness work together; a dense profile plus thicker walls yields a fuller, more pleasing tone.
- The material of your keycaps determines the frequency and tonal color of a press.
- Upgrading to thick PBT caps is a simple way to lower harsh resonance.
- This post explains how thickness absorbs impact energy and improves quality.
For a deeper dive on choices and measured effects, see the keycap material and thickness guide.
Internal Case Dampening Techniques
Packing the inner voids with dense materials stops many unwanted resonance modes. This approach treats the case itself as the primary source of ringing and stray sound waves.
Using a combination of bitumen sheets and closed-cell foam gives both mass and absorption. Bitumen adds weight and blocks low-frequency waves. Foam soaks up mid and high frequencies.
Work takes time: disassembling the case, cutting sheets, and fitting pieces around the PCB is not instant. The effort pays off with a quieter, more controlled tone.
“Every bit of foam added helps to absorb the energy that would otherwise turn the case into a loud instrument.”
- Fill empty cavities with acoustic foam to kill internal sound waves.
- Layer bitumen under foam for a mass-plus-absorption combination.
- Check the feet to make sure they do not contact the surface in a way that transmits vibration during heavy use.
- Proper case dampening prevents the structure from amplifying switches and stabilizers.
Result: Packing dense materials inside the case significantly cuts the energy that reaches the desk and lowers overall sound. This post shows that careful material choice and placement deliver professional, quiet results.
Optimizing Your Desk Surface for Acoustic Control
A thick surface mat can change how much energy leaves a typing area and travels through furniture. Placing a large rubber mat under the keyboard creates a soft layer that absorbs many of the impact waves before they hit the main surface.
Material matters: a solid wood top usually soaks up more low-end motion than glass or metal, which tend to reflect high-frequency sound. A dense fabric or foam-backed mat further softens the tone and lowers resonance.
This post shows how a mat acts as a barrier, cutting the amount of sound that travels through furniture. Adding isolation feet under nearby speakers also stops external vibrations from mixing into the setup.
“Small changes to the surface yield big wins in sound control and comfort.”
- Combine a stable wood surface with a thick mat for best results.
- Use isolation feet on speakers to prevent cross‑interference.
- A quality fabric mat can dampen high frequency resonance and lower noise overall.
Selecting Silent Hardware for Shared Spaces
Choosing inherently quiet hardware is the fastest path to a peaceful shared workspace. For many users, buying a purpose-built silent unit cuts the amount of effort spent on mods and trial runs.
The VGN V98PRO V3 is a clear example. It ships with Daiyu silent switches and internal dampening that lower rattle and clack at the source. That design keeps noise and surface output low without extra materials.
Start with a quality unit and save time. A well-made model controls the acoustic profile of a small office and keeps late-night typing from becoming a problem.
- Silent switches cut both bottom-out and return noise.
- Built-in dampening limits the need for foam or bitumen in the case.
- High-quality components make every keypress consistent and quiet.
- For shared spaces, this way is often the most reliable and efficient choice.
“Starting with silent hardware often gives the best balance of performance and low noise for tight spaces.”
Conclusion
A few targeted changes made the typing experience far more pleasant and neighbor-friendly. This post sums practical steps that fit tight spaces and real life.
Readers can follow this post to tune stabilizers, add mass, or fit soft pads under the feet for immediate gains. Small edits to the setup change how the surface and the , feel and act over time.
This final post gives the content needed to pick the right path for each case. One thoughtful mod to the feet or a single part swap will cut noise and improve daily comfort.
Thank you for reading this post. They hope the work pays off and that the feet you choose keep the workspace quiet and productive.