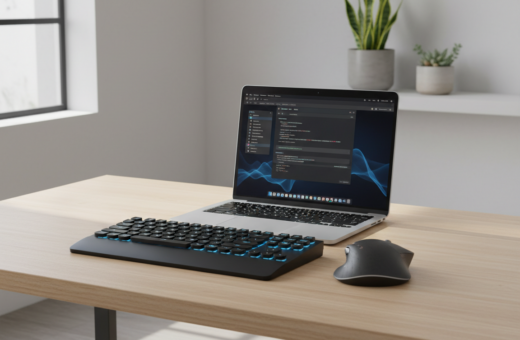
Many mechanical keyboards are louder than users expect. Their switches and moving parts create distinct impact sounds. That hardware interacts with the surface below and can amplify each stroke.
Understanding where sound comes from helps people address both internal switch clatter and external vibration. One clear fact: the desk often acts as a sounding board that makes the level higher than the keyboard alone would produce.
Practical noise reduction techniques target chassis resonance and surface echo. By analyzing each component, users can find ways that improve the typing experience. Implementing a few proven steps turns a loud mechanical keyboard into a more pleasant tool for long sessions.
The Science of Typing Noise
The audible character of a typing session depends as much on internal switch action as it does on the case and cavity that surround it.
Switch Movement
The mechanical switch contains a stem that travels vertically, and that motion creates scraping and impact sounds as it rubs against the housing.
When the spring returns the stem, it can strike the upper housing with a sharp click. Cherry MX Blue switches add a click jacket that snaps at actuation, producing a pronounced click.
Different switch types and keycap profiles change the timing and timbre of those impacts, altering overall sound level and character.
Resonance and Echo
Resonance is largely set by the case material; aluminum alloy cases often ring more than plastic shells and can boost vibrations that travel through the board.
Echo forms in the cavity between the PCB and the bottom case where sound waves reflect and amplify. Mounting style matters too: tray-mounted layouts tend to transfer more vibrations than gasket-mounted designs.
Engineers commonly add foam between the PCB and plate to damp cavity echoes and to tame the sounds that would otherwise escape the case.
“Understanding both the switch action and the enclosure is essential to predict and control typing acoustics.”
- Stem travel and spring return create direct impacts
- Case material and mounting influence resonance
- Foam and keycap profile shape the final sound
How Desk Acoustics Affect Your Typing Experience
The surface beneath a board can act like a secondary speaker, shaping what the user actually hears. A hollow wooden table often becomes an echo chamber, picking up vibrations from each press and making the overall sound louder and more resonant.
Glass tops behave differently. Their rigidity adds a metallic tinge that can make mechanical keyboards feel harsher during long sessions. Solid wooden tops, by contrast, absorb more of the strike and help tame the signature.
The case and feet of a keyboard transfer vibrations into the surface, so a lack of isolation magnifies keyboard noise. Decoupling the chassis from the desk prevents the surface from acting as a resonator and improves the typing experience.
- The surface serves as the final link and can amplify typing during intense use.
- Hollow tables pick up and broadcast vibrations, changing perceived sounds.
- Solid construction and isolation help minimize transmission and improve the experience.
“Understanding how the surface interacts with the case helps users target practical fixes to control sound and vibration.”
Choosing the Right Switches to Reduce Keyboard Noise on Desk
Selecting the right switch family and finishing steps directly alters what listeners hear from the setup. For many users of mechanical keyboards, swap choices change the signature before any case modifications or mats are added.
Linear vs clicky switches: Linear mechanical switches lack the tactile click, so they usually produce fewer high-pitched sounds and lower vibrations transmitted to the surface. Clicky types emphasize feedback and will raise perceived sound level.
Lubrication Benefits
Lubricating sliders and springs calms friction and rattles. Krytox 205g suits linear switches for a silky feel, while TriboSys 3204 is ideal for tactile types. Applying lube takes time but yields a noticeable reduction in internal sound.
Silent Switch Options
Silent switches incorporate internal cushions that cushion impact. Examples include the Akko fairy and Akko penguin silent switches. For larger keys, rubber O-rings (40A–50A hardness, 0.2–0.4mm thick) offer an easy way reduce reverberation without full disassembly.
“Choosing switch type and finishing techniques is the most direct way to shape what the user hears.”
- Swap clicky to linear or silent switches to lower surface-transmitted sound.
- Lubricate with Krytox 205g or TriboSys 3204 for long-term sound control.
- Use O-rings to cushion large keys and limit impact rings.
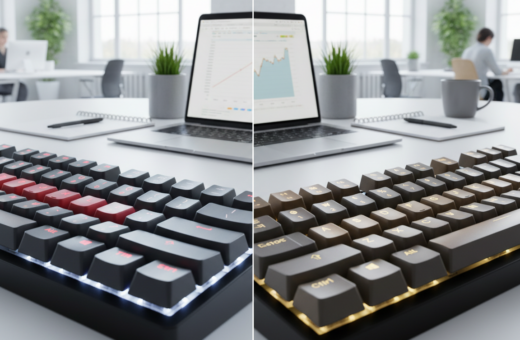
The Role of Keycap Material and Profile
Keycap choices shape the pitch and body of each press far more than many users expect. Thicker caps, typically 1.3–1.5mm, shift the timbre toward a lower-frequency clack that many find more pleasant.
PBT material stands out for durability and a grainy surface that calms high, sharp tones common with thin ABS. Many enthusiasts choose pbt keycaps because they keep their texture and offer a steadier sound across long sessions.
The profile and internal cavity size also matter. Shorter profiles like XDA or OEM reduce dispersion and concentrate the sound, while tall SA profiles create larger cavities that can amplify the switch strike.
- Material defines the base timbre—pbt typically yields a deeper, warmer sound.
- Thickness (1.3–1.5mm) lowers the perceived pitch of the clack.
- Profile and cavity control how sound disperses across the board.
“Selecting the right keycap material is a fundamental step in customizing the acoustic output of any mechanical setup.”
When they aim to tame typing noise and shape the overall sound, users should start with pbt keycaps and a thickness that matches their taste. Small swaps to cap material or profile often deliver the clearest change in character.
Modifying Keyboard Cases and Plates
Small changes inside the chassis can turn a bright clack into a muted thump. Effective case work focuses on filling cavities and adding layers that interrupt vibration paths. This lowers unwanted resonance and creates a more balanced sound across the board.
Foam Dampening Methods
Poron foam is a high-density option favored by enthusiasts for superior absorption. Placing Poron between the PCB and the bottom case reduces cavity echo and calms internal sounds.
EVA foam offers a budget-friendly alternative. It dampens vibrations within the chassis and helps achieve consistent acoustic results without heavy expense.
- Fill voids to eliminate echo chambers inside the case.
- Install foam between the plate and PCB to cut resonance from switches and keycaps.
- Apply bitumen sheets to the base to act as vibration-absorbers and limit chassis ringing.
“Proper dampening of the case is essential for achieving a uniform sound profile across all keys.”
Choosing case material matters too: thicker aluminum or rigid alloys help contain vibrations better than thin plastic housings that flex. Combining materials and targeted foam yields a marked reduction in overall level and improved acoustic quality for the mechanical keyboard.
Stabilizer Tuning Techniques
Tuning stabilizers targets the loud, hollow hits from larger keys and makes the entire layout sound more cohesive.
Stabilizer tuning is a key technique for calming rattles under the spacebar, enter, and shift. Enthusiasts commonly combine simple cuts and careful lubrication to smooth travel and limit metallic ping.
One common mod is the band-aid clipping method. It calls for trimming the plastic feet from the stabilizer stem and placing a small band-aid on the PCB under the stem. That soft landing pads the impact and absorbs unwanted vibration.
Thick grease at contact points is essential. Lubricating the metal wire where it meets the plastic housings removes friction and stops the annoying rattle many hear when pressing larger keys.
- Why it matters: Properly tuned stabilizers make larger keys feel uniform with the rest of the keys.
- Practical steps: Clip excess plastic, add a pad under the stem, and lube the bar and housing.
- Result: A cleaner sound and fewer distracting vibrations across the case.
“Tuning stabilizers is one of the most effective ways to improve the sound of larger keys.”
Utilizing Desk Mats for Sound Absorption
Using an expansive mousepad turns the workspace into an acoustic barrier that traps energy before it reaches the surface. A full-width mat acts as a soft layer between the peripherals and the table. It soaks up impact and limits transmitted vibrations.
Practical benefits: a wide pad protects the surface from scratches and creates a quieter typing experience. The foam-like core absorbs the energy of each press and lowers the overall sound level.
- Place a large mat beneath the keyboard and mouse to block vibration transmission.
- The mat works as a vibration dampener and prevents the table from amplifying keystrokes.
- Many users prefer a desk-wide mousepad because it fits both mouse and keyboard with room to spare.
- This is an affordable way to reduce keyboard noise without opening the case.
“Isolating the board with a quality mat is one of the simplest, most effective techniques for improving the typing experience.”
Advanced Software Solutions for Streaming
Advanced audio tools let creators block unwanted keystrokes while keeping voice clarity intact. Software and mic tech focus on separating speech from incidental clicks and low-level ambient sounds.
Implementing a noise gate is the most common software approach. A gate cuts the signal when it falls below a set threshold, so voice passes and light clicks are ignored.
Implementing Noise Gates
Streamers should tune threshold, attack, and release to avoid chopping syllables. Proper settings let the mic ignore short click peaks from mechanical switches while keeping breathing and consonants intact.
- Noise gates let speech through and block lower-level clicks from keys and stabilizer hits.
- Advanced mics use ANC and DSP to invert ambient sounds and lower the apparent level of mechanical switches.
- Physical dampening—placing foam or rubber material under the board—complements software for the best result.
- Microphone design and placement change how effective a gate will be; moving the mic away from the surface often helps.
“Combine software gating with simple foam or rubber dampening for a professional audio profile.”
For a practical guide to further blocking key clicks in live streams, see block out keyboard clicks for streaming.
Conclusion
A thoughtful approach to acoustic sources turns a loud setup into a clean, focused typing experience.
Addressing switches, stabilizers, and case resonance helps improve the overall experience and the daily typing experience they deliver. Simple steps like using O-rings or a wide mat give quick wins, while foam and lubrication provide long-term reduction.
For a practical checklist and deeper mods, consult the full guide to improving mechanical acoustics. Combining hardware changes with noise gates yields a polished audio profile for streaming and focused work.
Consistent application of these methods delivers a better experience, clearer typing, and a rewarding path to personal customization.