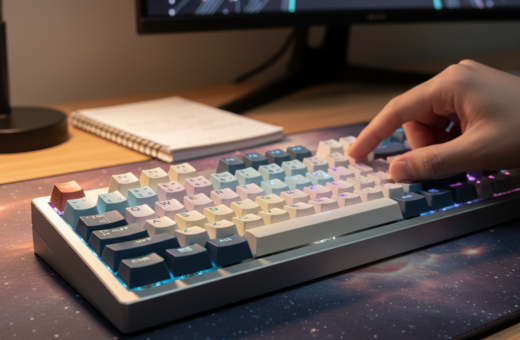
Small changes to balance and weight can transform how a setup feels. Joshua Smith noted on April 04, 2025 that proper setup and balance matter for consistent performance. Most users find that adjusting mass, riser position, or rod lengths fixes issues that a new product would not.
A tuned system often gives a bow-like response that improves every shot and reduces unwanted movement. When the weight and lengths are right, stability and the end point of motion become predictable. This helps hand position and pressure stay steady.
Achieving that feel usually follows a clear process of small adjustments to pins, rods, and pads. Learning the difference between products and testing lengths and weights can be more cost-effective than replacement. For practical steps and a thorough stabilizer tuning guide, see the stabilizer tuning guide.
Why Stabilizer Tuning Matters
Small, precise changes to mass and rod position can erase vibration and change how a bow feels in use. This process removes contact noise and improves the acoustic profile so the keyboard sounds more dampened and professional.
Balance and weight distribution reduce mechanical friction that causes inconsistent shots and riser vibration. When the setup has correct lengths and masses, movement becomes predictable and stability improves.
Proper adjustments to rods, pins, and weights stabilize the pin and help hand pressure stay even. That consistency minimizes the difference in feel across keys and cuts common issues like vertical or horizontal drift.
- Better sound: fewer rattles and a cleaner end point.
- Improved hold: consistent position and predictable shot behavior.
- Precision: small length or mass changes often fix subtle issues.
Whether altering rod position or overall weights, careful work produces a clear point of stability and a noticeably improved feel.
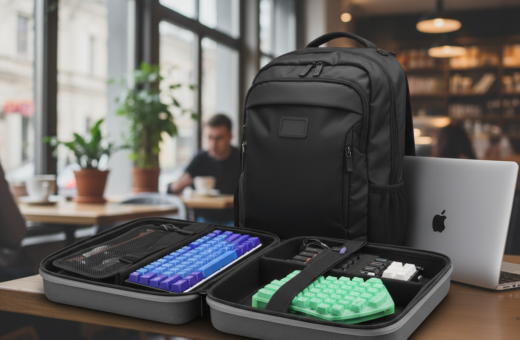
Essential Tools and Materials for Your Stabilizer Tuning Guide
The right combination of lubricants and tools shortens setup time and raises consistency. Starting with quality materials reduces friction and helps each adjustment hit its point.
Lubricants and Brushes
Use Krytox 205g0 or XHT-BDZ for smooth operation. These greases lower friction so the bar and rod move with less noise.
A size 0 brush reaches small corners to coat the back and side of the housing precisely. Proper application dampens the end of a key press and cuts pin-like clicks.
- High-grade Krytox or XHT-BDZ for housings.
- Size 0 brush for tight spots.
- Small cloths and cotton swabs for cleanup.
Specialized Modding Tools
Dedicated tools save time and protect components. A switch stem holder stops excess grease on fingers and speeds work.
Balancing a bow setup needs weight and riser tools, and the right rods and weights let one tune length and mass for stable movement.
- Switch stem holder and fine pliers.
- Weight kit and riser adjusters for balance.
- Organized workspace to make careful adjustments.
Understanding Stabilizer Anatomy and Types
Knowing how each part fits together is the first step to a reliable keyboard setup. This section breaks down common designs and why fit matters for weight and balance.
Distinguishing Plate Mount and PCB Mount
Plate-mount units clip into the plate and often feel lighter because the plate shares load. They are simple to install but can change the overall weight distribution of the board.
PCB-mount designs, like Durock V2 (screw-in), anchor to the PCB and give a firmer connection. Clip-in examples such as TX stabilizers fasten to the board without screws and offer reliable, repeatable performance.
- Sizes: 2u for small keys; 6.25u or 7u for spacebars require specific bar length for a consistent bow and stability.
- Alignment: The bar must sit squarely to control back and side movement and keep the bow behavior uniform across the key.
- Setup effects: Choosing plate or PCB mount changes the apparent weight and balance and affects how rods and weights tune movement and shot feel.
Proper installation on the riser and careful selection of rod length and weights reduces wobble and helps every keystroke feel even across the board.
Preparing and Clipping Stabilizer Stems
Careful trimming of stem legs often fixes mushy bottom-out and makes keys feel firmer. This small step creates a flat landing that improves acoustics and the overall feel of the keyboard.
Before clipping, check that the bar sits level. A balanced bar on a flat surface prevents ticking when pressing the back or side of a key.
Clipping stems changes how weight transfers to the riser and how rods move. Uniform leg length reduces wobble during return and produces a consistent bow-like response across larger keys.
- Flat stems: better contact and cleaner rod movement for a crisper shot.
- Balanced bar: prevents side or back noise and keeps movement predictable.
- Weight tuning: small changes to stem mass affect interaction with the riser and setup stability.
Careful preparation of these small parts is the process that makes many keyboards feel superior to new, off-the-shelf models.
Lubrication Techniques for Smooth Operation
A light touch of the right lubricant can turn a scratchy mechanism into a near-silent, responsive unit.
Apply Krytox 205g0 sparingly inside the housing to reduce friction. A tiny dab on contact points gives a smooth, dampened movement without slowing the return.
Work in thin layers. Too much grease adds weight and causes a sluggish feel. Focus on the inner rails and the back of the stem for consistent bow behavior.
Treating the Wires
Coat the bar and angled bends with dielectric grease so the wire slides cleanly in the housing. This reduces rattles where the wire meets the housing and helps maintain balance between back and side motion.
Make sure the wire sits straight and that rods align with the riser. Correct placement prevents mushy keys and preserves shot predictability.
Testing for Consistency
After lubrication, test each key with light and heavy presses. Listen for remaining noise and note any sluggish returns.
- Fine-tune weight: remove excess grease if the return slows.
- Check length: ensure bar travel is even across the bow.
- Repeat the process: small adjustments yield the best feel.
Advanced Modifications and Troubleshooting
Some stubborn noises only disappear after targeted cushioning and careful leaf checks. Advanced mods aim to stop persistent rattle and refine the overall feel. This section covers proven fixes and practical checks to finish the job.
Addressing Persistent Rattle and Switch Noise
The Holee mod places a small piece of adhesive bandage inside the stem to cushion the bar and quiet lingering ticks. It is low-cost and effective when housings and rods are already well lubricated.
If rattling continues, inspect the switch leaf for pinging. A tiny bend or seating change on the leaf often removes high-frequency noise that mimics housing issues.
- Balance the weight across the back and side bars so they sit cleanly in the riser.
- Fine adjustments to the bar and rods improve the bow-like return of each shot.
- Use precise tools to make small changes; careful work fixes the toughest issues over time.
When these steps are done correctly, a well-executed mod produces a quiet, consistent setup that feels more precise than many new boards.
Conclusion
A few careful adjustments can turn a good keyboard into a truly satisfying one.
Mastering these steps lets one transform a board into a high-performance tool that often feels better than a new model. By following this comprehensive guide, readers learn how to lubricate, clip, and balance parts for cleaner acoustics and firmer keys.
These mods remove rattle and mushiness, leaving each press smooth and consistent. Investing a little time yields a typing experience that rewards daily use.
For additional tips and a practical walkthrough, consult this useful resource: a useful tuning guide. May this help you reach the end of your modding journey with a keyboard you enjoy every day.