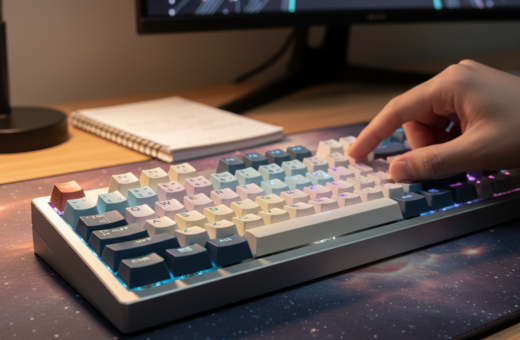
They spend long hours at their computer, so keeping a clean keyboard is vital for comfort and function. This short guide explains key steps for deep cleaning and regular care of mechanical keyboards without wasting time.
Practical advice helps remove dust and buildup and preserves quality for daily work or gaming. Most orders ship within 24-48 hours, and unused items may be returned within 14 days for a full refund, minus shipping and a 5% restocking fee.
This guide outlines simple steps for keyboard cleaning and safe use of a switch puller. By following professional techniques, they gain access to methods that extend the life of a mechanical keyboard and make long hours at the desk more pleasant.
Essential Keyboard Maintenance Tools for Your Desk
A compact set of supplies makes quick, effective desk-top cleaning possible. Keeping these items within reach speeds routine care and prevents buildup that can harm parts over time.
Brushes and Air Blowers
High-quality brushes are worth the small investment. A 1.5-inch paintbrush or pop-up brush works well for sweeping debris from between the keys.
For heavier dust, a rechargeable blower like the KiCa Jetfan 2 offers a reusable alternative to a 10-ounce can of Dust-Off. Compressed air is useful, but use short bursts to avoid pushing dirt deeper.
Microfiber Cloths and Swabs
Thin microfiber cloths—such as those made for glasses—clean surfaces without scratching. Pair them with cheap cotton swabs for tight spots and edges.
For oily residues, a small amount of isopropyl alcohol on a soft cloth removes grime safely. Always test on an inconspicuous area first.
Keycap Removal Kits
A dedicated keycap removal tool often includes a switch puller and small brushes. This kit preserves switch integrity during deep cleaning and makes keycap washing simple.
- Brush: sweep out loose debris.
- Air: blow dust from hard-to-reach places.
- Cloth & swab: remove oils and sticky residue.
For a step-by-step cleaning process, consult the detailed keyboard cleaning guide.
Preparing Your Workspace for Cleaning
Before starting any work, power down the computer and unplug the device. This prevents electrical damage and keeps small parts safe.
Clear the desk so there is easy access to every component. A tidy surface reduces the chance that keycaps or screws will be lost during the process.
Lay a soft cloth or tray to catch removed pieces. Organizing small containers helps them stay visible and prevents accidental drops.
- Turn off the computer and disconnect all cables.
- Clear the area to remove dust buildup from surrounding surfaces.
- Arrange supplies within reach before beginning the cleaning keyboard task.
This guide emphasizes that a clean workspace supports the long-term quality of mechanical devices and makes the job faster. For a complete step-by-step reference on preparing and caring for computer hardware, consult this step-by-step guide.
Techniques for Removing Surface Debris
Start by loosening visible crumbs and dust with a gentle shake and short bursts of air. This quick action removes loose material and makes the next steps easier.
Shaking and Vacuuming Methods
Turn the keyboard upside down and tap or shake gently to dislodge obvious debris. Gravity will free most large pieces without risking damage.
Use a soft brush to sweep between the keys and clear stubborn dust from narrow gaps. A small, handheld vacuum with a brush attachment then collects the loosened dirt.
- Flip and tap to remove loose crumbs and surface debris.
- Sweep with a soft brush to reach between keys and clear compacted dust.
- Apply short blasts of compressed air to push out settled dirt from deep crevices.
- Vacuum with a small brush head to capture what you loosened.
- Tilt the unit at different angles while using air to reach hidden pockets of debris.
Following these simple steps keeps the unit cleaner and extends its life. This short guide offers practical methods anyone can use at their desk.
Deep Cleaning Mechanical Keyboards
Deep cleaning a mechanical unit starts with a simple plan and a clear photo of the layout. This makes replacing keys quick and error-free.
Removing and Washing Keycaps
Use a keycap removal tool to lift keycaps gently and place them in a bowl of warm soapy water. Let them soak while the board is cleaned.
Scrub each keycap with a soft brush and rinse under clear water. Dry caps on a towel, then air-dry until they are completely dry before reassembly.
Ensuring Components are Dry
Wipe the plate and switches with a microfiber cloth slightly damp with a 2:1 mix of distilled water and isopropyl alcohol for stubborn spots. Do not let any liquid pool around switches.
Use cotton swabs to remove dust and residue around switch housings, and finish with short bursts of compressed air to clear trapped particles.
- Photograph the layout before removing keys.
- Soak and scrub keycaps in warm soapy water; rinse and air-dry.
- Clean the board with a slightly damp microfiber cloth and targeted swabs.
- Ensure all parts are completely dry before reassembly to protect circuitry.
These steps help preserve quality and prevent damage during deep cleaning of mechanical keyboards.
Managing Stubborn Grime and Stains
When regular wipes fail, a few precise steps will remove deep dirt without risk. Start by using a microfiber cloth that is only slightly damp with water to clean around the keys. This lifts oily residue and loose dust without soaking components.
If water is not enough, apply isopropyl alcohol sparingly to a cotton swab. Gently roll the swab along edges and under keycaps to remove stubborn dirt. Work in small sections and let surfaces dry before moving on.
A melamine magic eraser can buff scuffs, but use it very gently. It acts like fine sandpaper and can dull finishes if overused. A toothpick helps scrape away caked-on grime from crevices without harming switch housings.
- Use a slightly damp microfiber cloth to clean around keys.
- Apply isopropyl alcohol with a cotton swab for oily spots.
- Gently rub stubborn marks with a magic eraser, sparingly.
- Scrape deep deposits with a toothpick, then clear dust with a soft brush.
Ventilate the room when using alcohol. Regular, careful cleaning prevents grime buildup and keeps keyboards working smoothly.
Conclusion
A short routine can stop grime from building up and slow wear on parts. Regular attention keeps a clean keyboard ready for long hours and improves overall quality.
By following this guide, they learned clear steps to remove debris and care for mechanical keyboards. Using compressed air, a soft brush, or soapy water lets them clean keycaps and surfaces safely.
Always let components become completely dry before reassembly and keep a microfiber cloth and cotton swab nearby for spot work. Small, regular steps extend the life of a mechanical keyboard and keep keys responsive.
, With consistent care and easy access to the right supplies, users can keep their setup looking and performing like new for years.