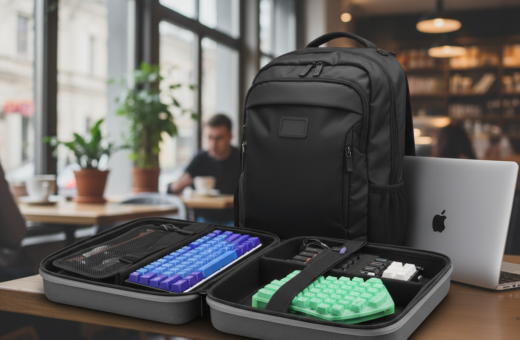
Enthusiasts often start by picking a single change that alters feel and sound. One common path is swapping to Husky Linear Switches or replacing stock keycaps with the PolyCaps Whale set. These steps give a clear, measurable shift in typing experience.
The process of customizing a mechanical keyboard mixes parts and technique. A person tests switches, stabilizers, and case tweaks to refine each key. Small upgrades, like foam or a tape mod, cut unwanted noise and tighten up the tone.
Modding is a patient craft. They consider PCB fit, stem alignment, housing quality, and whether to add rings or do lubing. Adjusting the spacebar and stabilizers brings consistency across the board.
Good advice centers on one idea: choose changes that match how one types. Whether someone likes clicky switches or prefers linear switches, the right parts and time investment produce a noticeable, lasting improvement.
Understanding the Impact of Useful Keyboard Mods
Small hardware changes can reshape how a mechanical keyboard feels and sounds. A modded device means parts were swapped or adjusted from the factory build to improve performance or tone.
Common upgrades include replacing stock keycaps, adding internal dampening, or tuning stabilizers. These steps reduce hollow resonance and create a firmer, more professional sound.
Enthusiasts choose alterations to match typing style. They adjust actuation force and tactile feedback so each press feels consistent and predictable.
- Case damping: fills or foam inside the case cut ring and thud.
- Keycap swaps: change profile and material for better comfort and clarity.
- Fine tuning: lubing and aligning stabilizers deliver even travel across large keys.
When selected carefully, each mod transforms ordinary keyboards into tools that aid gaming and productivity. Thoughtful choices yield measurable gains in feel, sound, and consistency.
Essential Stabilizer Tuning for Consistent Typing
Tiny adjustments to stabilizers can turn an average typing session into a precise, quiet experience. This section covers the practical steps to tune stabilizers so large keys feel uniform and predictable.
Lubing Stabilizer Housings
Applying Krytox 205g0 to stabilizer housings is a proven way to remove rattle and reduce plastic-on-plastic friction. When done right, lubing makes a mechanical keyboard feel smoother and more refined.
Straightening Stabilizer Wires
Before lubing, test wires on a flat surface to find ticking. Slightly bending the wire corrects misalignment and improves the spacebar’s sound.
“Taking the time to tune stabilizers ensures each large key sounds and travels consistently.”
- Use dielectric grease at wire ends as a budget-friendly option for cleaner sound.
- Finish lubing and you will notice mechanical keyboards sound more professional.
- Proper housing treatment prevents common rattles and boosts long-term feel.
Selecting and Installing Switches for Better Feel
Choosing the right switches sets the tone for every press and shapes the entire typing feel. Start by matching the switch type to the user’s needs: consistent travel or audible feedback.
Recommended options include Gecko Silent Linear Switches for muted operation. They cut down on noise while keeping smooth actuation. Users who want clicky feedback can still opt for tactile or clicky switches.
Compatibility matters. Confirm the PCB supports the pin layout and hot-swap style before ordering new keyboard switches. Some mechanical keyboards require specific pins or soldering for proper installation.
Lubricating Switch Components
Lubing is a careful process that improves smoothness and reduces friction. Apply a thin film of grease to the stem and inside the housing. Too much will gum the switch; too little gives no benefit.
- Open each switch and clean debris first.
- Apply lubricant sparingly to the stem rails and housing walls.
- Reassemble and test several keys before finishing the full set.
“Proper lubing of the switch stem reduces friction and makes typing feel more fluid.”
For a deeper dive into mechanical keyboard customization, see mechanical keyboard customization.
Enhancing Sound Profiles with Case Dampening
Changing what sits inside the case can turn a hollow board into one with depth and punch. Case dampening affects both the sound and the feel of every key press.
Sorbothane vs. Kilmat
Sorbothane is a high-end option that absorbs impact and gives a deep, controlled thock. It is effective but costly.
Kilmat, a car dampener, cuts metallic ping very well. Its metallic top can short a PCB, so careful installation is required for safety on a mechanical keyboard.
Benefits of Neoprene Foam
Neoprene foam offers a balanced way to reduce hollowness without overspending. It improves case tone, is easy to cut, and plays well with different switches and keycaps.
Using Poly-fill for Original Sound
Poly-fill is the budget choice that preserves a board’s original sound profile while removing the airiness inside the case. It keeps the board’s character but reduces unwanted resonance.
- Neoprene or Poron foam removes hollow resonance for a deeper sound profile.
- Sorbothane gives premium dampening; neoprene often wins on price/performance.
- Poly-fill reduces noise yet keeps the board’s original timbre intact.
- Kilmat reduces metallic ping but needs insulation to protect the PCB.
- Adding case foam can slightly affect stem travel and the feel of switches; try O-rings on keycaps for extra quiet.
“By testing a few foam and fill options, users can dial in a thocky or brighter profile to match their preference.”
For a quick reference on case dampening options, see case dampening options.
Applying the Tape Mod for a Poppier Sound
A simple strip of tape behind the PCB can shift a board’s tone from muted to snappy. The Tempest Tape Mod uses painter’s tape applied to the back of the PCB to change how the keyboard sounds.
How it works: Two layers of non-conductive painter’s tape are the usual sweet spot. This double layer adds a thin damping layer that produces a poppier, less muffled sound without harming components.
Why people try it: It is cheap, reversible, and easy to test. Many users stack one, two, or three layers to compare the sound profile and find the right balance for their switches and keycaps.
Take care to avoid covering solder points, LEDs, or other PCB parts. If the tape touches components, peel and reposition to prevent interference or added noise.
“Two layers of tape often yield a brighter, punchier note that adds depth to daily typing.”
- Tempest tape mod is inexpensive and reversible.
- Two layers usually give the most pleasing pop.
- Test layers with your switches and foam to dial in the final sound.
Utilizing PE Foam for a Creamy Typing Experience
PE foam on the top of the PCB gives many builds a velvety, “creamy” sound that users notice immediately.
How it works: Placing a thin layer of foam between each switch and the PCB changes the acoustic cavity. The stem meets the housing with less sharpness, producing a rounder sound and a softer overall feel.
Install carefully. Cut precise holes for stabilizer housings. If the stabilizer slots are blocked, large keys can feel mushy and inconsistent.
- Adds a smooth, unified sound signature to the board.
- Requires accurate cuts around stabilizer housing and switch pins.
- Can make different keyboards sound similar—consider the trade-off.
Many enthusiasts pair PE foam with a tape mod to balance pop and warmth. Taking the time to measure and trim the layer yields a consistent typing experience that lasts.
“A well-cut PE layer turns a bright board into a creamier, more cohesive instrument.”
For a step-by-step guide to installing foam, see installing PE foam.
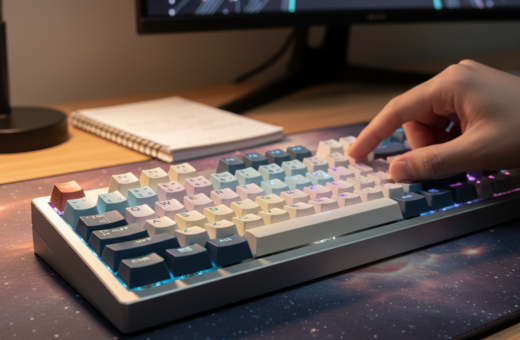
Customizing Keycap Profiles for Ergonomic Comfort
Swapping keycap profiles changes posture, reach, and how each finger meets the switch. Choosing the right profile affects both the typing comfort and the board’s sound.
Keycap profiles like Cherry, OEM, SA, and DSA alter height, angle, and finger placement. Cherry and OEM keep a lower, more familiar slope for long sessions. SA and DSA change the arc and can reduce fatigue for some users.
Choosing the Right Keycap Puller
Always use a wire keycap puller. Wire pullers remove keycaps with less force and cut the risk of scuffs compared to plastic pullers.
Before removing sets, take a clear photo of the layout. This helps when replacing a custom spacebar or nonstandard keys.
- Impact: Customizing keycaps is one of the most impactful mods for feel and sound.
- Tools: Use a wire puller to protect plastic stems and delicate legends.
- Profiles: Pick Cherry for comfort, SA for deep audio, DSA for uniform rows.
- Switch pairing: Whether using clicky switches or linear switches, match keycap material to the intended feel.
“Investing in quality keycaps and the right tools delivers a safer, more ergonomic typing experience.”
Advanced Case Modifications with Modeling Clay
Filling the lower shell with modeling clay reshapes how the board resonates. Plastilina Modeling Clay adds mass and absorbs vibration, turning hollow cavities into a denser acoustic chamber.
Why it works: The clay’s density reduces ring and thud, so many users of mechanical keyboards notice a deeper, more refined tone. This technique was popularized by the YouTuber Keybored and is now common among enthusiasts seeking a premium feel.
Practical tips: Cover any holes or gaps in the case to stop clay from contacting the PCB. Apply clay only to the bottom shell and avoid pushing material into ports or mounting points.
- Plastilina fills remove hollowness and add weight to the case.
- When applied carefully, cheaper keyboards sound and feel more premium.
- Dense clay offers strong sound dampening for a solid, controlled tone.
“Many enthusiasts find this mod makes boards feel significantly more substantial.”
Risks and Considerations Before You Start Modding
Before cutting into a board, understand the risks that can turn a fun project into an expensive repair. Work slowly and plan each step so the end result improves feel and sound without costly mistakes.
Opening the case or desoldering parts often voids a manufacturer’s warranty. Check the terms before disassembly, especially for popular models like the Redragon FIZZ K617 or DRACONIC K530 PRO.
H3: Managing Soldering Risks
Soldering and desoldering carry the risk of PCB damage. A misplaced iron or excess heat can lift pads or harm traces, so practice on cheap boards first.
- Verify part compatibility — ensure Kailh BOX V2 clicky switches fit your layout.
- Take time to learn proper desoldering tools and techniques; rushing breaks stems and stabilizers.
- Protect LEDs, tape, and foam when working so plastic parts do not melt or shift.
“Careful planning and steady hands turn modding into a rewarding experience rather than a repair bill.”
Final note: Modding can transform one device into a personalized tool. With proper precautions for switches, spacebar mounts, and the PCB, the process stays safe and satisfying.
Conclusion
, A well-planned set of upgrades turns a stock device into a finely tuned tool for daily work.
Modding is rewarding when changes match how someone types. Start with stabilizer lubing for immediate, measurable gain. Small adjustments often beat sweeping overhauls.
Experiment with case foam, tape layers, and different keycap profiles to craft a unique sound signature. Test one change at a time and keep notes on results.
Safety matters. Research the specific model, protect the PCB, and use proper tools. With patience and care, anyone can transform a standard build into a personalized masterpiece that boosts comfort and productivity.